Roasted Sweet Potato Noodles with Cincinnati Chili

roasted sweet potato noodles with Cincinnati Chili

Spring. In the midst of soft rain and thunder booming, and an occasional peek of sunshine, we try to turn the page, lightening in mood and plate. And yet, this is spring in the midwest, so the page is equally likely to turn back and remind you that winter is not that far behind us after all. Cold winds blow in off the Lake, sending us scurrying back to hibernation, a bottle of cabernet popped and the oven cranked for roasting.

And so it is that this week has been a loopy roller coaster taking us from low 40s to 80 degrees and back again. If you’re sharing this springtime joy ride with me, pop a bottle of your own, and let’s have one last hurrah with our wintery root vegetables.

Have you climbed on the Inspiralized craze yet? Turning humble veggies into noodles is the de rigeur health craze of the moment, and being a lover of all things vegetal, I’m on board, maybe not for health reasons, but simply to enjoy veggies in a new way.  But simple zucchini noodles with tomato sauce – that’s a little boring. Let’s talk about sweet potatoes, perhaps my favorite starchy veg. I love ‘em baked, roasted, gratined, hashed, sauteed, pureed, any way you can make ‘em, I’m in.  So when it occurred to me that I could noodle AND roast them, I went all in, and you’ll find this dish gracing our table on a near weekly basis.

spring blooms

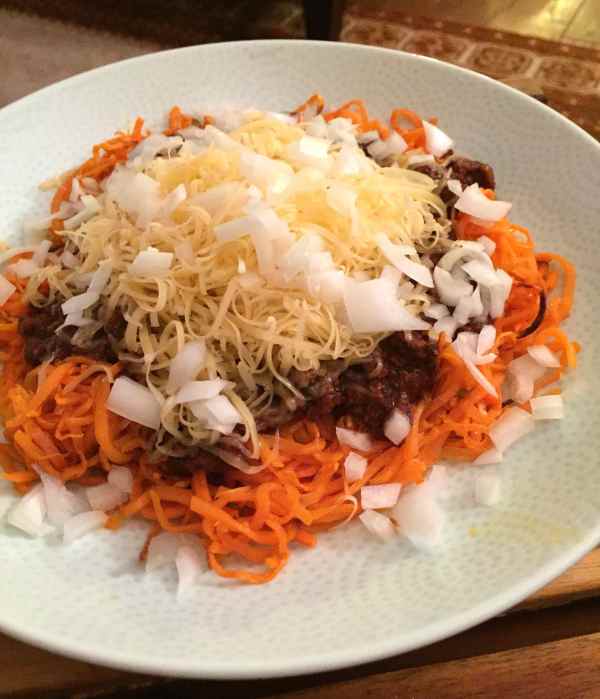
Let’s break it down – a quick, high heat roast on your sweet noodles leave them tender, sugars concentrated, with the occasional crispy, caramelized tendril to shatter against your teeth. Dress the bowl with a little spicy Cincinnati Chili, onion and extra sharp cheddar, and I think you’ll do as we’ve done, and forsake the traditional spaghetti with your Cinci chili from here on out. The sweet, roasted noodles are the perfect balance against the deep savoriness of the chili, and the sweet noodles highlight the hint of cinnamon and cocoa in the chili. Did I mention that a batch of Cincinnati Chili freezes in individual portions beautifully? With a well stocked freezer, you can have a bowl of these comforting noodles on the table in less than 30 minutes. Do it!

Roasted Sweet Potato Noodles
Serves 2

  • 2 medium sweet potatoes, peeled, and ends cut off
  • 1 T olive oil
  • 1 good pinch of kosher salt
  • 1 ¼ cups Cincinnati Chili
  • raw onion and grated sharp cheddar for garnish
  1. Preheat your oven to 425F, convection roaring if you’ve got it. Throw a rimmed baking sheet in the oven while it preheats.
  2. Get out your spiralizer, peel and cut the ends off your sweet potatoes, and turn those taters into noodles. Put them in a large mixing bowl, and use your kitchen shears to snip the noodles into shorter pieces – maybe 10-12 snips should reduce them to manageable lengths.
  3. Drizzle 1 T of olive oil and a good pinch of kosher salt over the noodles, and toss them with tongs.
  4. Remove the sheet pan from the oven, spray with oil, and turn the noodles onto the greased pan in one even layer.
  5. Place the pan of noodles in the preheated oven, and roast for 10 minutes, then gently turn the noodles and roast for another 5 minutes.
  6. While the noodles finish roasting, reheat your chili, chop the onion, and grate some cheddar.
  7. Serve the finished roasted noodles in bowls, garnishing with chili, onion and cheddar. Enjoy!
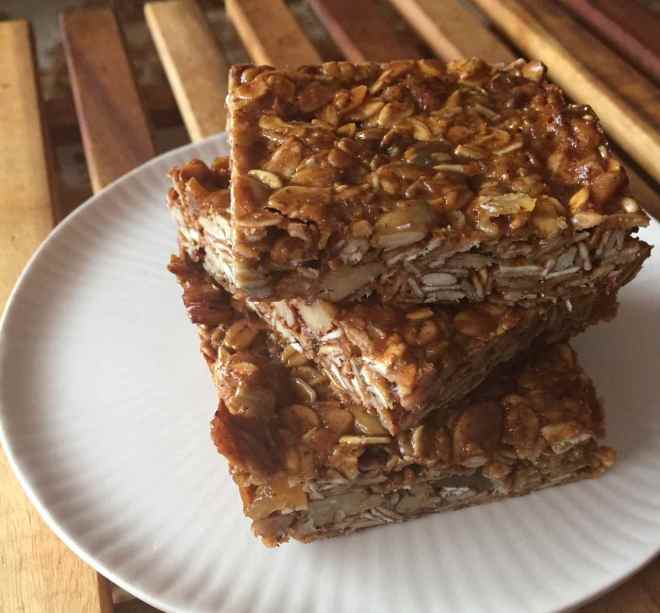
Olive Oil and Maple Granola Bars


olive oil maple granola bars

Hi, friends. I’ve been away for awhile, and I’ve missed you. I couldn’t stay away forever, and hope that 2015 will be a true new beginning, with more posts and sharing in this space. In the meantime, if you want to catch up with me in “realtime,” follow along on Instagram for the meal-to-meal update of what’s simmering in the kitchen, and tell me what you’d like to see me share here. What brought me back?  Granola Bars. Of course.

Granola bars are an essential nutrient in this house – easy to grab in the morning on your way out the door for a quick breakfast, or to slip into a bag for snacks while traveling. I’m endlessly tweaking, trying new flavor combinations, spices, sweeteners and nut butters to stick ‘em together, but I get bored…even with four recipes already posted here!

Earlier this fall, my girl Johanna, from the fabulous DeFloured Bakery, gifted me some granola clusters leftover from her experiments with making granola bars. As we were discussing technique, materials and “goo-stickiness-factor,” she mentioned that she was only using olive oil and maple syrup for the fat and sweetener, and that the combination made for a more savory bar with the sweetness muted, even though there was the same amount of maple syrup as I would use in sugars and honey in my recipes. Then I tasted the granola, and I was SOLD. I had to get back in the game and start playing.

Johanna’s granola clusters had the same savory crispness of my favorite granola recipe from Molly – with the combination of maple and olive oil making for a very satisfying, not too sweet granola that is irresistible for snacking or scattering atop a small bowl of greek yogurt. I wanted to achieve that same crispness that the olive oil brings, but in bar form.

This would prove to be a great challenge, as the oil being a more slippery partner for the thinner maple syrup, my initial forays resulted in delicious granola, but not the sturdy, yet crispy bars I was seeking. A few lucky friends have been sampling the evolution of this recipe for weeks as I went from loose granola, to fragile bars, to an almost-there bar that just didn’t quite hold up to transport in my lunchbag without crumbling. Today, I got the mix right, and now it’s time to release it to you.

The finished bars are less spiced than my cocoa granola bars or smoked paprika bars, as I wanted the nuts and deep savoriness of the maple and olive oil to be the star here, so I just warmed things up a touch with a little garam masala, cinnamon, allspice and black pepper for a hint of mystery.

Coconut Garam Masala Granola Bars
Makes 24 Bars (4 rows, 6 bars per row)

Note: This is a smaller batch than my other granola bar recipes, so please use a quarter sheet pan (9×13 rimmed baking sheet).
Inspired by Orangette and Defloured Bakery 

  • 2 ½ cups gluten free rolled oats (I use Trader Joe’s)
  • 1 ½ c mixed seeds and nuts (I used a mix of sunflower seeds, pepitas, pecans)
  • ¾ cup unsweetened large flake dried coconut
  • 2 T Butter
  • ⅓ c olive oil
  • ¼ c  cup maple
  • 1/3 c brown rice syrup
  • 1 T honey
  • 1/4 cup almond butter (I use Trader Joes salted, unsweetened creamy)
  • ¾ tsp morton’s kosher salt
  • ¾ tsp garam masala
  • ¾ tsp cinnamon
  • ¼ ground allspice
  • ¼ tsp ground black pepper

Equipment:

  • quarter sheet pan (9×13 rimmed baking sheet)
  • small saucepan, preferably non-stick
  • small silicone spatula
  • large, stiff silicone spatula
  • parchment paper

Instructions: 

  1. Preheat oven to 300, convection setting if you’ve got it.
  2. Line a rimmed baking sheet with parchment paper, and add the oats and pepitas and sunflower seeds, and gently mix together with your (clean) hands.
  3. Combine the maple syrup, olive oil, almond butter, salt, garam masala, black pepper, allspice and cinnamon in a small saucepan. Set aside.
  4. Pop the oat mixture into the oven, on the middle rack. Toast for 20 minutes, stir, and then add the coconut flakes and pecans, stirring into the mix with a spatula. Toast for another 10 minutes then stir again. Toast for another 8 minutes, while you heat the saucepan of liquids.
  5. Place the syrup/oil saucepan over medium heat, stirring regularly with a small spatula to incorporate the spices and almond butter into the liquids until you have a smooth “glue.” Do not bring the mixture to a boil, but slow lazy bubbles are okay – you need the syrup just on the edge of simmering. Once the final 8 minutes of oat toasting is done and the coconut is starting to turn a warm toasty tan at the edges, the liquid mixture should be warm and a smooth, thickish mixture with approximately the thickness of cold maple syrup, dripping off a raised spatula in ribbons.
  6. Remove the oat mixture out of the oven and pour into a large mixing bowl.
  7. Raise the oven temp to 325, convection setting if you have it.
  8. Pour half of the syrupy glue over top and mix into the oats using a stiff spatula, ensuring all the oats get a thin skim of the sticky mixture. Then, drizzle the last half of the goo over the oats, and stir together – put some muscle and patience into it to ensure an even, sticky coat.
  9. Place the parchment paper back onto your rimmed baking sheet, and pour the sticky mixture out onto the baking sheet into a few lumps across the full pan. Use your spatula to spread the mixture into a semi-even packed layer. Take another smaller sheet of parchment and place it over one corner of the pan, and use your hands to press the mixture firmly down with even pressure into one well-packed layer, moving the smaller piece of parchment across the sheet pan as you go, until you’ve managed to press the entire sheet pan down. Peel the small piece of parchment off and discard
  10. Return the pan to the oven, bake for 10 minutes, then rotate the pan 180 degrees, and bake for 10-15 more minutes. The finished bars should be deeply golden, and you should see an almost toffee-like lacy candy forming at the edges. Remove the pan from the oven, and set on a cooling rack for 25 minutes, then cut while the bars are still warm.

Note: You do not want to let the bars fully cool before cutting – the olive oil/maple syrup mixture is a little more fragile than bars made with brown sugar/honey/brown rice syrup. If the bars fully cool, the bars will not cut as easily, and are more likely to crumble a bit.

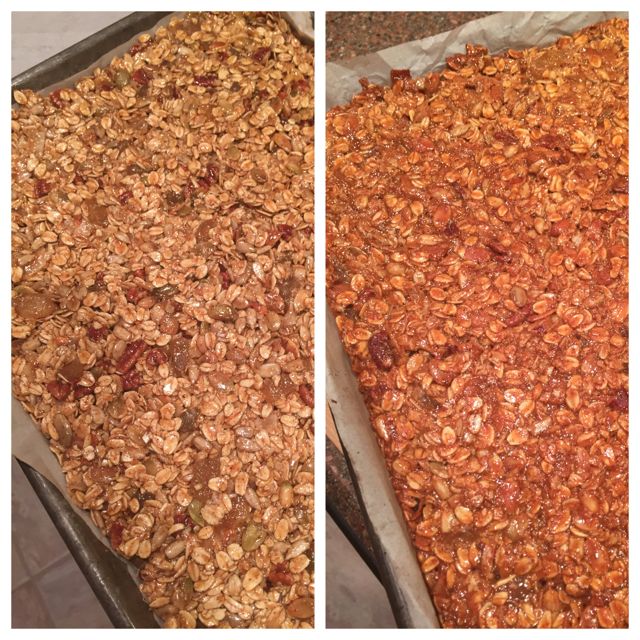
olive oil granola bars before and after

Olive oil and maple granola bars – Left: before baking. Right: Deep golden brown after baking

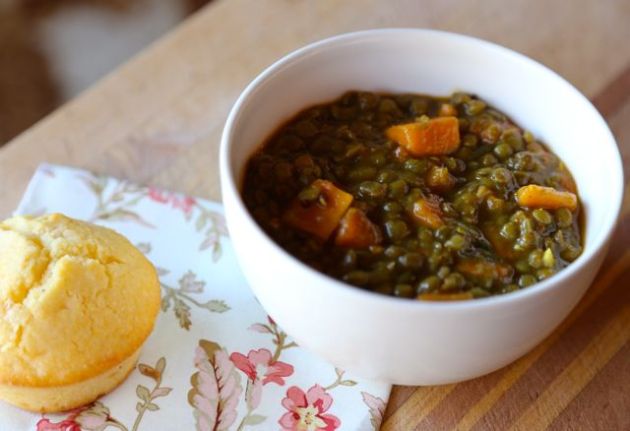
Vegetarian Curried Green Lentil Soup with Sweet Potatoes

Vegetarian Curry Green Lentil and Sweet Potato Soup

One of my favorite things in the world might be throwing an impromptu dinner party with just a few hours’ notice. Maybe it’s all those years in my teens and early 20s spent in restaurant kitchens, but I love the mad dash to plan a menu and execute with only what I’ve got in the fridge and pantry.

Just such an opportunity arose Thursday afternoon. We’d scheduled a get together with all of my girlfriends to celebrate the year that was, gathering in a few out of towners in Chicago visiting family for the holidays. We’d planned to go out for dinner, but had not called ahead for reservations, and the spot we’d picked was booked, which gave me the opportunity to offer to host and whip up…something for a crowd of 10. Mind you, we’d just returned from five days in Michigan with family, so the fridge was a teensy bit bare, but there were enough bits and bobs of green, and my well stocked pantry saved the day to make a fitting feast.

With 3 hours until party time, I assembled a big pot of beef and black bean chili, spiked with a tiny bit of Mexican chorizo that was lingering in the fridge, gluten free cornbread, a white peach balsamic vinegar slaw with fennel, apple, cabbage, toasted pepitas and dried cranberries, and finally, this pot of curried green lentil soup, which turned out to be an unexpected star of the menu.

The soup is vegetarian, and can be vegan with swapping out the tiny bit of butter for olive oil and suffer none for the change. Typically, I have homemade veggie broth in the freezer, but the freezer was bare, so as I searched the crisper drawer for flavor options, I knew I’d have to layer in flavors with a couple of tricks to make a full bodied soup that satisfied.

I’ve fallen hard for Indian flavors in the last few years, and with my dear friend Sabera teaching me what her momma taught her, I applied a couple of Indian techniques in the creation of this quick soup. Making the flavor foundation by frying the black mustard seeds and ribbons of fresh curry leaves in oil before sauteeing the veggies gets this humble soup off to a good start, and applying the same technique of herbs fried in oil at the end brings a fresh punch of curry to the finished pot of soup.

Curried French Green Lentil and Sweet Potato Soup
Serves 5-6 as main course

Lentil Quick Brine
1 ½ cups of french de puy lentils*
2 T kosher salt for lentil brining, plus more to season soup to taste
water

Soup

2 T olive oil, divided
1 T butter
1 T brown mustard seeds
12 fresh curry leaves, divided*
1 onion, diced
2 carrots, peeled and diced
1 orange or red bell pepper, cleaned and diced
2 1/2 T Madras (or sweet) curry powder, divided
1 tsp garam masala
4 cloves minced garlic, divided
1 T tomato paste
2 Sweet potatoes, peeled and cut into bite sized cubes
¼ tsp red pepper flakes
water
1-2 tsp red wine or sherry vinegar

*Ingredient notes: I’ve recommended the French de Puy Lentils here, as I like that they keep their shape a bit more than standard brown or green lentils, but if you can’t find them, by all means, substitute with your favorite variety of lentil.

You will typically find fresh curry leaves at Indian or Asian Markets – a flat, waxy leaf, you’ll know them when you smell them, and when you do, buy a couple of bunches and keep them in your freezer in a plastic Ziploc bag, so that you can pull out a few leaves as you need them.  Fresh curry leaves add an extra earthy punch that you just can’t get from ground curry leaves that create intense aroma in the finished dish. If you can’t find curry leaves, add an extra teaspoon or two of curry powder for a little extra oomph.

  1. Soaking the lentils:  Boil up a kettle of water, and add 2 T kosher salt to a 2qt bowl. Add the lentils, and cover with 3-4 inches of water, stirring to dissolve the salt. Soak for 1-2 hours while you prep the veggies for the rest of the soup and perhaps enjoy a cup of tea.
  2. Heat a large soup pot over medium heat. Add 1 T butter and 1 T olive oil to the hot pan. When the butter has melted, add 1 T brown mustard seeds and 6 fresh curry leaves sliced into ribbons. Stir around with a spatula until you start to hear the mustard seeds start to pop and jump around in the oil.
  3. Add the diced onion, carrots and bell pepper to the pot with a pinch of kosher salt, and saute for 5-8 minutes, until the onion is translucent, stirring every now and then.
  4. Add 1 ½ T of madras curry powder, 1 tsp garam masala, ¼ tsp red pepper flakes and 2 minced cloves of garlic to the softened vegetables and stir for 1-2 minutes until fragrant.
  5. Drain the lentils, and rinse for a few seconds under running water in a sieve. Pour the lentils into the pot along with the tomato paste and cover with 2 inches of water, cover and bring to a boil. Once the soup reaches a boil, turn the heat down to low and simmer, covered, for 40 minutes, until the lentils are nearly tender, and just a tad on the al dente side. Stir the pot whenever you think of it, but it doesn’t need a lot of babysitting. Add more water if the lentils get too thick, you want the soup to have a bit of broth to it.
  6. Add the cubed sweet potatoes to the pot, stirring them in, and then cook covered for another 20 minutes until the potatoes are tender. As before, pour a little more water into the pot as needed.
  7. When the lentils and potatoes are tender, it’s time to spice up the soup. Heat a small pan over medium heat, then add the remaining 1 T of olive oil, 2 cloves minced garlic, remaining and 6 fresh curry leaves sliced into ribbons. Cook for 2 minutes until the curry leaves start to crisp and the garlic has softened a bit, and then add the 1 T madras curry powder, and stir for 30 more seconds.
  8. Pour the oil and spice mixture into the soup and stir. The last hit of spices and oil will brighten up the soup and refresh the curry flavors.
  9. Finally, season the soup with kosher salt to taste – it might take a healthy pinch or two to get the right balance, and finish with 1-2 tsp of red wine or sherry vinegar to brighten the flavor of the cooked lentils. Serve your hungry guests.

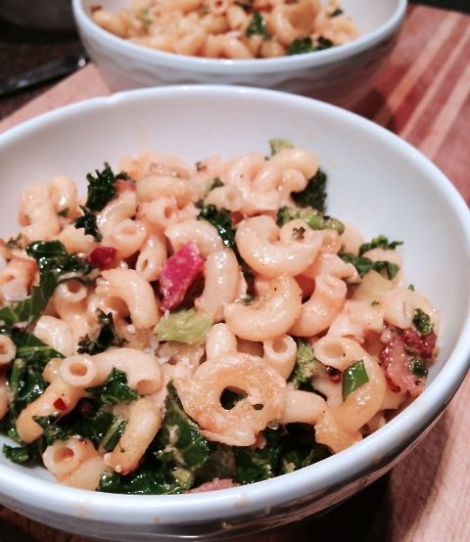
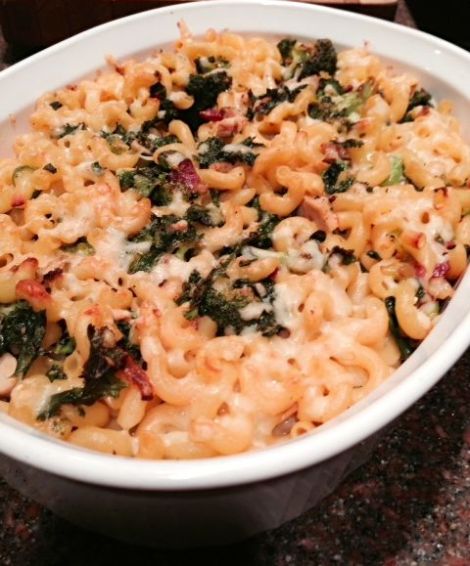
Kale and Broccoli Mac and Cheese – Gluten Free

Image
This is the perfect cozy dish for a cold, rainy fall day. In Chicago, we’ve been enduring a sodden two days, and adorable tots dressed as pirates, princesses and monsters had to seek indoor trick or treating options in apartment buildings and shopping malls. I don’t have to tell you that when we were kids, we ran around in that rain, and returned home triumphant with a hefty, if wet load of candy.

Meanwhile, I came home late, and decided I wanted to cook up some homemade mac and cheese, with a heavy hand on the cheese – and the kale. This is the kind of comfort food you throw together with bits and bobs of whatever greenery and cheese you have on hand. Cook and bake, and in 40 minutes, you’ve got some killer comfort headed straight for your belly.

Kale and Broccoli Mac
Serves 6 as a main dish

12oz gluten free elbow macaroni
3 strips of bacon, diced
1 T olive oil
2 cloves garlic, minced
¼ onion, minced
1 bunch kale, rinsed, stemmed and sliced into ribbons
1 ½ cups broccoli, cut into bite size pieces
3 T butter
½ cup half and half
¼ cup almond milk*
1 tsp smoked paprika
¼ tsp red pepper flakes
3 T cream cheese
1 cup sharp cheddar cheese (Kerrygold cheddar is my favorite), divided
salt & pepper to taste

*hint, if your fridge is stocked better than mine, just use ¾ cup of whole milk in place of the half & half/almond milk blend

  1. Preheat the oven to 400F. Butter a large casserole dish and set aside.
  2. Boil a large pot of salted water, then cook the pasta according to the package directions until it’s al dente, perhaps a minute shy of the package instructions.  Reserve ¼ cup of pasta water.
  3. While the pasta cooks, heat a large skillet over medium heat, add the diced bacon and cook 1-2 minutes until some of the fat starts to render. Add the kale, broccoli, garlic and onion and stir together. Cook for another 3-4 minutes until the kale is tender, then turn off the burner, and set the pan of kale aside.
  4. Strain the pasta, and run under cold water to stop the pasta from cooking. Pour drained pasta into a large bowl and toss with a bit of olive oil to prevent sticking.  Set aside.
  5. Return pasta pot to the burner over medium heat and add butter. When the butter has melted, add the milk, smoked paprika, red pepper flakes and ⅓ of the cheese. Whisk constantly until the cheese dissolves and is incorporated with the milk. Add another ⅓ of the cheese and continue whisking. Add half of the pasta water and add the cream cheese in small dollops. Continue whisking for another 3-5 minutes until cream cheese is incorporated and sauce thickens slightly.
  6. Pour the pasta back into the pot and stir to coat with the sauce. Add the kale and broccoli mixture to the pot and stir to combine. Taste, and add salt and pepper to taste. Scoop the whole mixture into the buttered casserole dish, and top with remaining ⅓ cup of cheese.  Bake for 15 minutes, then serve.

Image

Disclaimer: These aren’t the best photos, but sometimes, you just want to snap a quick pic with your phone, and when a friend pleads for the recipe later, you get what you get…this mac is no less delicious for the poor lighting in my kitchen.  

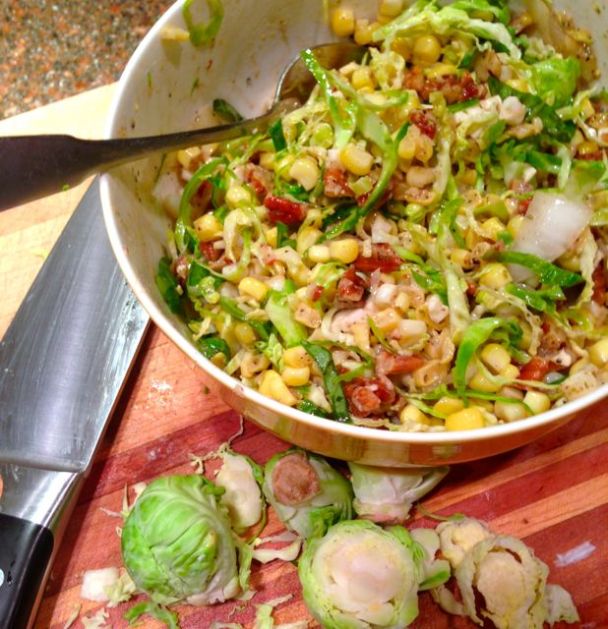
Sweet Corn and Brussels Sprout Salad with Rosemary and Pecans

Image

So, I’ve missed you all. It’s been awhile, and life has pulled in so many directions in the last 6 months – our first trip to Italy with Shauna and Danny, saying farewell to my grandma and my great aunt – the Sutherland clan is a little light on history without those two. Speaking at conferences, a new role at Edelman, celebrating a cousin’s wedding, and throughout – cooking as meditation to unwind after work, and to wind up for the weeks ahead.

I owe you some grander stories, some beautiful photos, but right now, there is salad. A dear friend, Gina, requested this recipe after seeing this image on Instagram. Apparently all I need to get back here is for someone just to ask. Life really is that simple sometimes. So I’ll get over the writing drought just by getting on with it, because you need to feast on this salad while the corn is still fresh at the farmer’s market.

Crunchy, tangy, herbal, salty, sweet…this salad hits all the notes. If you’re feeling feisty, add a little red pepper flakes or aleppo pepper. Just make it – you won’t regret the 20 minutes of chopping and mixing needed here, and if you happen to dive into the salad before it cools in the fridge a bit, I won’t blame you.

Bless you, Gina, for reminding me that sometimes, you just have sit down and WRITE, and not worry for the perfect photo or words to capture the moment. Let’s eat.

Sweet Corn and Brussels Sprout Salad with Rosemary and Pecans
Serves 2-3 as a side dish, or one as a main course

2 ears of fresh sweet corn, kernels cut off the cob
4-5 brussel sprouts, washed, outer leaves removed,
2 T minced onion
3 T toasted pecans
2 ½ T olive oil, divided
2 T sherry vinegar
½ tsp dijon mustard
½ tsp kosher salt
½ tsp dried rosemary
4 basil leaves, rolled and sliced into ribbons
2 T crumbled feta
fresh ground black pepper to taste

  1. Combine the rosemary and salt in a spice grinder or mortar and pestle and whiz/bash them together a bit to release the oils in the rosemary and break it down into smaller pieces. Set aside.
  2. Chop up 2-3 T of onion and gather into your hand and rinse under cold water for a few seconds to mute the strong onion flavor. Drain, and set aside.
  3. Make the vinaigrette. Combine 2 T sherry vinegar, 2 T olive oil, ½ tsp dijon, and 2 pinches of the salt & rosemary in a small bowl. Whisk together with a fork. Don’t worry if the vinaigrette is on the tart side, the corn will soak up much of the acid. Set aside.
  4. Heat a non-stick skillet over medium heat, then add the pecans and toast for 2-3 minutes until you the aroma meets your nose, shaking the pan a few times while they toast. Pour the toasted nuts onto a cutting board and chop into small pieces. Set aside.
  5. Return the pan to the heat, and add the remaining ½ tsp of olive oil along with the 2 ears of corn kernels. Add another pinch of the salt/rosemary mixture and toss together in the pan with a rubber spatula. Heat through for 1-2 minutes, just enough to unlock some of the sugar in the corn, but not long enough to cook – you still want the corn to have some crunch.
  6. Add the vinaigrette to the pan and gently stir, then pour the corn into a bowl. Add the pecans and a pinch of black pepper and stir. Taste, and add additional salt/rosemary, if needed. Let the corn cool in the fridge for a few minutes so the flavors can blend.
  7. Take the corn from the fridge, and add in the crumbled feta, onion, thinly sliced brussels sprouts and sliced basil. Toss, taste and serve. If it needs more salt, another splash of vinegar, adjust seasoning until you’re happy.


Gluten Free Orange Cranberry Millet Muffins

Gluten free orange cranberry muffins with millet

Hello, friends! The calendar finally rolled over to Spring last week, and it was as if the heavens flipped a light switch, turning the sunshine back on. For those of you in the midwest, I’m sure you’ll agree that this winter has been brutal. Dark, cold and windy with little sunshine to cheer our souls. And so, I hibernated through the winter, standing quietly in my kitchen on weekend mornings warming the house with stews and soups, but with little energy to create something new for you to try. Of course, we had a little snow on the first day of Spring to test our limits, but when the sun finally broke through the clouds, it felt like we had made it. The crocuses and daffodils could not be far behind.

Sunrise on the first day of Spring, Chicago

Sunrise on the first day of Spring, Chicago

This Easter weekend has been the gift we have all been waiting for. Friday was a stunning 40 degree day, with beaming sunshine and the people of Chicago were all smiles with faces turned up to the sky to drink in that Vitamin D. Mark and I took the day off from work and spent the morning tromping through the woods – Mark geocached while I rested on a log watching the deer graze and basking in the warm sunlight. We had tacos at Big Star, and then buzzed downtown to take in a few hours at the Art Institute and a stroll through Millennium Park. Heavy coats and hats were shucked, and the city was bursting with energy as we all awoke from our long winter’s slumber.

IMG_1085

Soaking up some sunshine in the woods

I woke up this morning with an itch to bake – something light and fresh for Easter breakfast. Browsing through Instagram, I saw Sarah’s  picture prepping for a fresh batch of muffins, and I knew that was just what I wanted.

Do you remember when frozen yogurt first came on the scene in the late 80s, in the days of low-fat diets and bran muffins? Lake Orion’s very first yogurt shop, right across the parking lot from LS Foods (where Mark bagged groceries), made fantastic homemade muffins. Mom & Dad would take us there occasionally after church, and we’d get to pick out the muffin of our choice. My very favorite muffins were the orange cranberry with a tiny crunch from millet.

IMG_7595

Tender muffins scented with orange, studded with cranberries and a slight crunch from millet

I remembered that Heidi Swanson had a recipe in Super Natural Every Day for millet muffins, and found just the blank canvas I was looking for. I adapted Heidi’s recipe, making it gluten free and played with the flavors to capture that cranberry crunch I was after. The finished muffins have a delicate orange flavor from the zest, good structure and a tender crumb thanks to the greek yogurt, and I adore the slight crunch from the millet. This will definitely be my base recipe for all muffins going forward.

Gluten Free Orange Cranberry Millet Muffins
adapted from Heidi Swanson’s Super Natural Every Day

280g All Purpose Gluten Free Flour Mix (I use Shauna’s blend, but you can just as easily use a mix like Pamela’s, Bob’s Red Mill or Cup4Cup)
⅓ cup raw millet
1 tsp baking powder
1 tsp baking soda
1 tsp xanthan gum
½ tsp guar gum
½ tsp fine grain sea salt
½ tsp cinnamon
1 cup full fat greek yogurt (Greek Gods is my favorite)
2 eggs, beaten
8 T butter melted & cooled
½ cup honey
Grated zest of 1 orange
Juice of half the orange (about 3 T)
½ tsp orange flower water
⅔ cup dried cranberries

  1. Preheat the oven to 400 degrees, with a rack in the upper ⅓ of the oven.
  2. Combine the flour, millet, guar and xanthan gums, baking powder, baking soda, salt and cinnamon in a medium mixing bowl. Whisk to combine and aerate. Set aside.
  3. Melt the butter in a 3 cup measuring cup, or another mixing bowl.
  4. Whisk the eggs in a small bowl.
  5. Add the greek yogurt, orange zest, orange juice, orange flower water and honey to the melted butter and stir to combine. Add the beaten eggs and stir until fully incorporated.
  6. Pour the wet ingredients into the dry ingredients, sprinkle in the cranberries, and fold together with a spatula until fully incorporated.
  7. Scoop the batter into greased muffin tins, a generous ¼ cup per muffin.
  8. Bake on the top rack for 15 minutes, then move to the lower middle rack for another 6 minutes. Muffin tops will be well browned, and test with a toothpick – if it comes out clean, the muffins are done.
  9. Cool in the muffin tin on a baking rack for 10 minutes, then carefully slide a knife around the edge of each muffin, and turn each one out onto the cooling rack to cool for another 5 minutes or so before slicing and enjoying with a thin skim of butter and cup of coffee.

What’s your favorite muffin flavor combination? Share in the comments below! 

Oatmeal Singles with Caramelized Whiskey Bananas

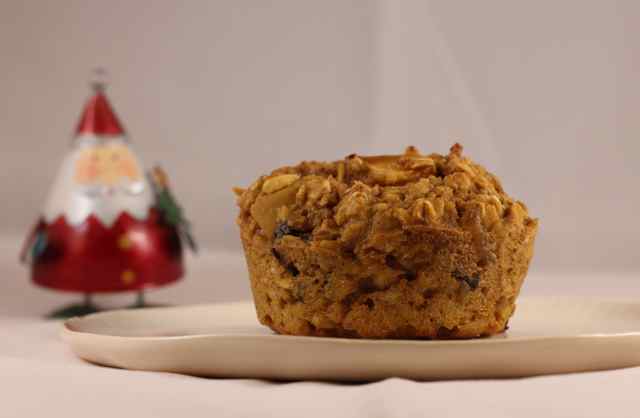
Oatmeal singles with caramelized whiiskey bananas

Oatmeal singles with caramelized whiskey bananas and chocolate chunks

We have a little problem in our house. A problem that manifests itself daily in hordes of small storage containers that return home each evening with us from work. All of the cooking done each weekend to provide healthy breakfasts, lunches and snacks results in many, many small dishes that fill the top rack of our dishwasher in a blink. Most weeknights, we run the dishwasher with a full-to-bursting top rack, and a fairly light bottom rack. I do not enjoy the daily putting away of the clean containers, that must be stacked just so in a near Tetris-like fashion, so I am always looking for a way to use fewer containers on a daily basis. Enter the oatmeal single.

While browsing around on Pinterest, I came across Emily’s recipe for baked oatmeal singles…the recipe is very similar to my own baked oatmeal, just baked into muffin form – genius! I took Emily’s recipe for banana chocolate muffins and amped it up a bit with caramelized bananas with a shot of whiskey…and fair warning, you might have to taste the caramelized bananas a time or two, just to make sure they’re edible. A cook has got to have quality control, right?!

The finished muffins are perfect for busy weekday mornings – just pop one in the micro for 25-30 seconds, and head on out the door with a warm breakfast in hand, ready for munching.

And friends, you should know that Mark calls these delicious little wonders “Grumblecakes,” after a cartoon from Home Star Runner. Be sure to click on the grumblecake in the bottom right corner at the end of the animation.

Oatmeal cake with caramelized bananas

Even Santa likes oatmeal cakes with caramelized bananas

Baked Oatmeal Singles with Caramelized Whiskey Bananas
Serves 12

Oatmeal Mixture:
4 cups Bob’s Red Mill Gluten Free Rolled Oats
2 cups unsweetened vanilla almond milk (or other milk of your choice)
2 tsp pumpkin pie spice (or cinnamon)
2 eggs
3/4 tsp kosher salt

Mix-ins
3 bananas, peeled and sliced into rounds
3 T packed brown sugar
2 T butter
splash of whiskey (because you CAN)
1/4 cup dark chocolate mini chips

  1. Scoop the oats into a large mixing bowl and set aside.
  2. Pour the almond milk (room temp, or slightly warmed) into a medium sized mixing bowl. Add the two eggs, salt, pumpkin pie spice, and ¾ tsp kosher salt and whisk until you have a smooth mixture, with the eggs beaten into the milk mixture.
  3. Pour the milk mixture over the oats, and stir gently to combine with a rubber spatula, and let the mixture rest while you deal with the bananas.
  4. Heat a non-stick pan over medium heat and melt 1 T butter in it. Add the bananas, and stir them into the melted butter. Let them cook for 3-4 minutes, until they start to break down a bit at the edges, then stir in the brown sugar. Cook for another 1-2 minutes, until the bananas breakdown almost completely, into a caramel colored ooze, with lighter lumps of banana barely intact. If you feel like it, add a splash of whiskey or bourbon and stir into the bananas – 1-2 tablespoons should do it. Turn off the heat, and remove the bananas from the heat and set aside to cool.
  5. Preheat the oven to 375F, convection if you’ve got it. Give the oat mixture a stir while you wait – the oats should have already soaked up much of the milky liquid.
  6. When the oven is ready, spray 12 muffin tins with olive oil, or grease with butter.
  7. Fold the caramelized bananas into the oat mixture, and then stir in the chocolate chunks.
  8. Fill the muffin tins with the oat mixture – each cup should be full – the muffins won’t really rise.
  9. Slide the muffins into the oven on the center rack and bake for 30-40 minutes – check for doneness at 30 minutes if baking in metal tins. If using a silicone muffin mold, you’ll likely need closer to 40 minutes to fully cook the oats.
  10. The finished muffins should be browned on top, and if you slide a paring knife into the center of the cake, they should have a moist crumb, but not gooey.
  11. Cool the cakes in the tin for 10 minutes, then slide a butter knife around the edge of each cake, and remove to cool fully on a cooling rack before storing in the fridge in a storage container for 1 week.  Reheat cakes in the microwave for 25-30 seconds each.

What’s your favorite quickie weekday morning breakfast to get the day started right? Share in the comments section below…

The Wednesday Chef’s Bolognese

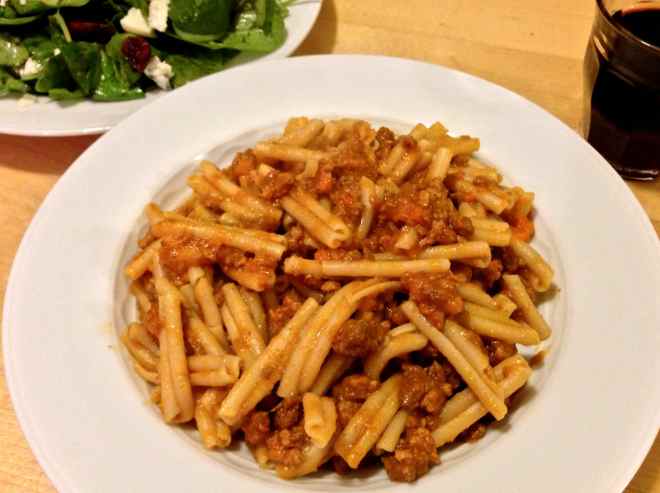
Pasta Bolognese. Long-simmered perfection in a plate of pasta.

Pasta Bolognese. Long-simmered perfection in a plate of pasta.

Happy Thanksgiving weekend, friends!  I hope that your weekend has been filled with feasting, family, and most importantly – time at home to relax. We had a lovely Thanksgiving with family on Thursday, and have been hiding out at home since – having a couple of days with no to-do list, and no agenda was just the balm we needed. The house may not be any cleaner for our sloth, but sometimes, a little laziness is just the prescription needed to rest and recharge for the final rush to close out 2012 and head into the rest of the holiday season.

I recently devoured yet another culinary memoir, My Berlin Kitchen, from Luisa Weiss of The Wednesday Chef blog. I’ve been reading Luisa’s posts for years, and loving her reflections on a life lived with parts of her heart’s home residing in Boston, New York, Berlin and Italy, and always longed to learn more of her story. My Berlin Kitchen is the perfect answer to that longing, as she shares the bones of her personal story and the tastes, scents and flavors that make up her life. To say that you should buy the book is an understatement. You should buy one copy for yourself, and another for anyone else in your life who loves food. It’s that good.

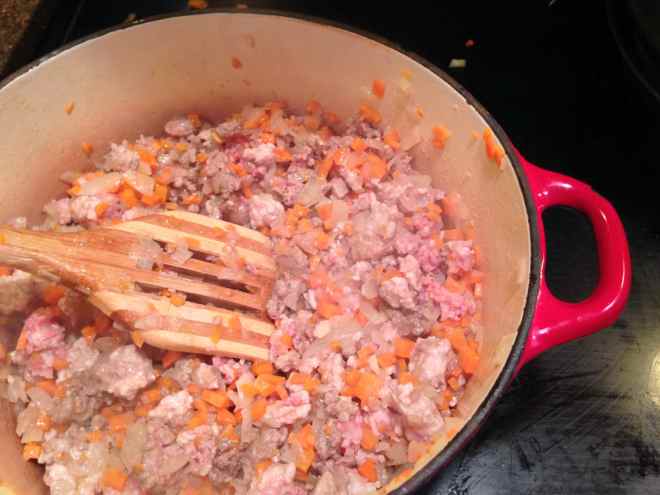
bolognese sauce - sauteeing the meat

Sauteeing the meat for the start of the Bolognese.

Luisa’s story is punctuated by a recipe at the end of each chapter, a summary snapshot of a moment, a taste, a person, a conversation in her life. Much like Molly Wizenberg’s, A Homemade Life, this makes perfect sense to me – the intermingling of story and taste…that’s what food blogging is, right? As I was reading through, I found myself bookmarking recipes to be made later, and once done, I knew that Luisa’s Bolognese sauce would be first up. She describes the long simmered sauce as her ultimate comfort in challenging times, the meat laden sauce slowly contracting into a quivering, magical softness…I could not resist. And neither should you.

Truly, the hardest thing about Luisa’s Bolognese is mincing the carrots – not a task I particularly enjoy. But once you’re past that and the sauteeing of onion and carrot, the next 7 hours of gentle simmering pass by in a state of benign neglect. Give it a stir when you’re passing by the stove, to incorporate floating fat back into the sauce, but really, the sauce doesn’t need you. We walked to Taste Wine and Food and ended up chatting in the shop for over an hour, and then followed that with a 6 mile run…all while the sauce simmered away without us. The sauce didn’t miss us one bit.

And when we returned from our cold run, famished and ready to demolish anything in our path, we had to hold for one final hour, to allow the sauce to cook for the full prescribed 7 hour simmer…it’s hard to do when your house smells of red wine, tomatoes and meat sauce, but you should wait. Oh, yes. Your patience will be rewarded with a sauce that slumps and slinks into the crannies of your favorite pasta, and the gentle essence of meat and tomato blend with red wine in a perfectly balanced, nearly silky balanced bite. For a sauce with a skinny list of ingredients, and not a single spice beyond salt, this sauce is magical. Hands-down, the best I have ever made. You should make it, too.

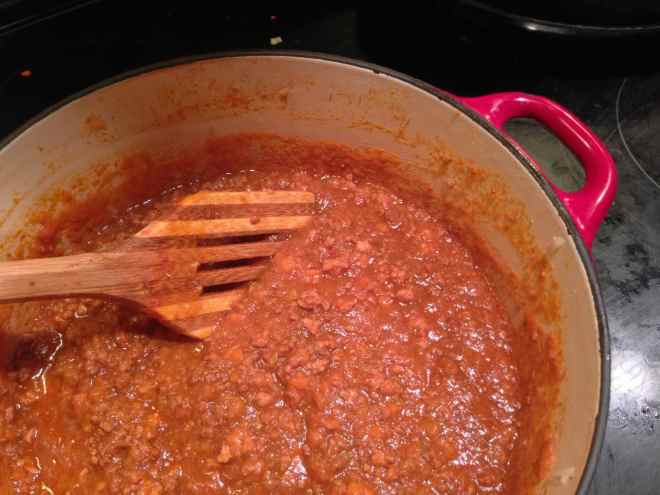
The finished Bolognese. Meaty, silky perfection

The finished Bolognese. Meaty, silky perfection

Luisa has shared a different version of Bolognese on her blog, but you should really grab a copy of the book, and make the version stashed in its pages – it’s even simpler than the version on her blog. You won’t be sorry.

The Wednesday Chef – Marco Canoras Bolognese (not the version from her book)
What’s your favorite pasta dish that rings of comfort and home? Share your thoughts in the comments!

*Apologies for the not quite as good photos. I didn’t feel like getting out the DSLR and lights, so I made do with the iPhone. 

Grain-Free Cauliflower and Sweet Potato Pizza

cauliflower and sweet potato crust pizza

If you’ve been tooling around the food blogs or Pinterest in the last few months, you’ve likely seen a photo or post about cauliflower pizza. I’ve had friends share links with me, but I had never been convinced that this was a good idea.

You see, I have been a lifelong hater of cauliflower…not just mild distaste, but a full on aversion – odd since I love all other brassica veggies – broccoli, cabbage, brussels sprouts…but cauliflower remained the one lonely veggie on my “will not eat list.” I’ve always thought that the smell of cooking cauliflower smelled like sweaty gym socks (I still kind of do). I’d tried mashed cauliflower, roasted, spiced it up with Indian curry, or slathered with chipotle puree, and still – meh.

It wasn’t until one of my colleagues, Natalie, whose taste I very much trust, came into work one morning and declared that I MUST try cauliflower crust pizza. I was still skeptical, then Natalie assured me that the taste of cheese and spices in the crust could overturn my previous thoughts about this bland veggie. Well, Natalie was right – and then some.

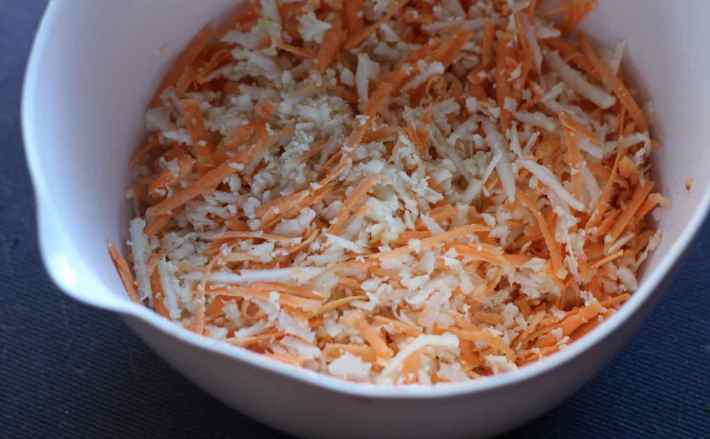
grated cauliflower and sweet potato
In researching the many recipes for cauliflower pizza, I wanted to minimize the effort, maybe to cut my losses if it didn’t work out – just to swear that I had given this thing a fair shot. As always, Lori Lange had just the shortcut I needed. Rather than steaming and ricing the cooked cauliflower, Lori recommends grating the raw ‘flower with a box grater (so easy!), and simply microwaving it for a few minutes. Genius. With this tip, I was on my way.

My first pizza was good – and to go from a head of cauliflower to pizza in under 30 minutes makes this a great option for weeknight meals, when taking the time for a traditional gluten-free dough to rise just isn’t in the cards…AND, you’re getting an extra serving of veggies, too!

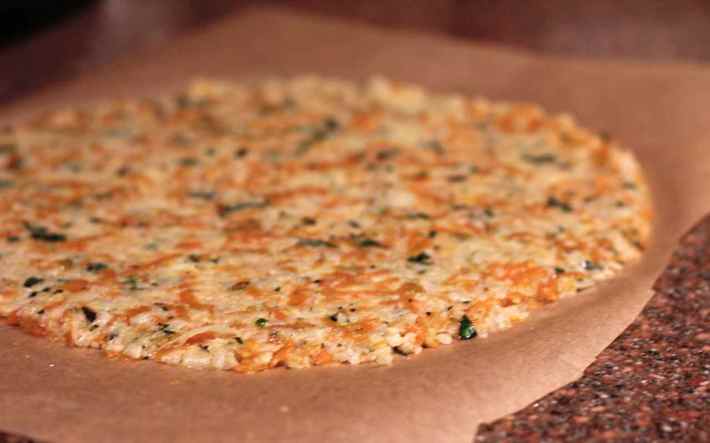
cauliflower and sweet potato pizza crust

On my second attempt, I had the tiniest little head of cauliflower in the crisper, and I needed something else to add a little bulk to the crust. I found a small, slightly shrively sweet potato hiding in a drawer (sweets shouldn’t be stored cold, as it will convert some of the sugars to starch and the taters will taste less sweet). I peeled the sweet potato and grated it along with the cauliflower, and the resulting crust held together a bit better with the starchier potato. This time, I also skipped the traditional pizza sauce, which kept the finished crust a bit firmer, but if you do add sauce, go a bit light on it.

This pizza is GOOD. Really good. It’s changed my perception of cauliflower, and to make pizza healthy, well…that’s something we should all be on board with.

What do you think – will you take the plunge and give cauliflower pizza crust a try? Share your thoughts in the comments below! 

Cauliflower and Sweet Potato Crust
Adapted from Lori Lange, Recipe Girl
Serves 2

Crust:
2 cups raw, grated cauliflower
1 small sweet potato, washed, peeled and grated
1 T fresh basil, minced (optional), or 1 T dried italian herb blend
½ tsp salt
¼ tsp fresh ground black pepper
1 egg, beaten
⅓ cup finely grated fontina cheese

Toppings:
⅓ cup chopped ham
2 oz soft, marinated feta (Yarra is my favorite), or  soft goat cheese
drizzle of olive oil
½ T fresh basil, minced
Note: this is pizza, so use whatever toppings you like. If you use a tomato sauce, go a bit lighter on the sauce, as the extra moisture will take away from the crispness of the crust.

Special equipment: pizza stone, box grater, parchment paper, rolling pin

  1. Place your pizza stone in the oven (if you don’t have one, place your baking sheet in the oven), and preheat to 450 degrees.
  2. Grate the cauliflower and sweet potato with a box grater and place in a mixing bowl.
  3. Put the bowl in the microwave and cook for 6-8 minutes until the veggies are tender. Take the bowl of cooked veggies out of the micro and set aside to cool.
  4. Grate the fontina cheese, and mince the basil. Beat the egg in a small bowl with a fork.
  5. Add the cheese, basil, salt, pepper, cheese and egg to the cauliflower and sweet potato bowl. Gently stir together with a rubber spatula.
  6. Cut two pieces of parchment large enough to hold the pizza, and spray one side of each piece with olive oil. Set one piece of parchment on the counter, oiled side up, and scoop the crust mixture onto the middle of the parchment, using your hands to pat the mixture into a circular shape about 6 inches across.
  7. Cover with the other sheet of parchment, oiled side down. Use a rolling pin to gently roll out the dough into a large circle, until the finished crust is about ¼” thick. Peel the top layer of parchment off.
  8. Open the oven, pull out the rack with the pizza stone, and carefully transfer the crust to the stone on the parchment…I find it’s easiest to do this with a buddy, and each person grabs two corners of the parchment to move the pizza onto the stone. A pizza peel will also do the job well (I don’t have one).
  9. Bake the crust for 15 minutes, until golden, and the edges look fairly crispy. Remove the pizza from the oven, and crumble the feta or goat cheese over the crust. Drizzle about 1T of the oil from the marinated feta (or just 1 T plain olive oil) over the crust. Sprinkle the ham over the pizza.  Return the pizza to the oven for 3 minutes to melt the cheese and heat the toppings.
  10. Remove the pizza, slice and serve. Enjoy!

grain-free cauliflower and sweet potato crust pizza

Sundays in the Kitchen

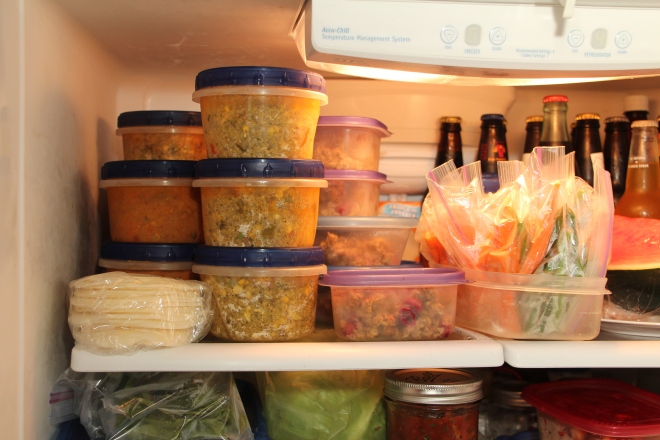
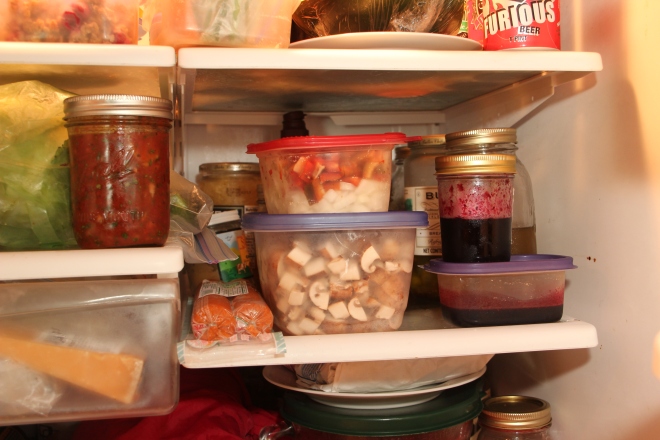
The glory of the Sunday fridge is undisputed.

If you’re friends with me on Facebook, you know that each Sunday I post a list of my Sunday achievements in the kitchen. Sunday mornings are my time to get up early, walk the dog on the beach while making my mental list of to-dos for the morning. By 8am, I’m at the grocery to pick up any last needed items for the week, and by 9am, I’m in the kitchen. My weekly goal is to have all breakfasts, lunches, snacks and 2 dinners for the week prepped by 1pm in the afternoon…sometimes I’m a little quicker, sometimes a little slower. The important thing is that nothing intrudes on this block of time.

A morning in the kitchen sets me up for a successful week at work, where all I have to do is grab breakfast, lunch and snacks from the fridge and toss it in my lunchbag on my way out the door. Having a couple of dinners prepped ahead, and Sunday dinner leftovers for another night make it easy to get dinner on the table quickly, even after a long day in the office.

When I’m done with cooking and prepping Sunday afternoons, there is nothing more glorious than opening the fridge and seeing that wall of storage containers and know that I’m ready for whatever the week ahead brings. Friends often ask how I plan and get all the cooking done each weekend, so here’s how the magic happens (of course, there really is no magic, just some Type A organizational mojo and a teensy bit of help from my younger years spent in professional kitchens as a prep cook).

Lunches, breakfasts and snacks live on the top shelf – red lentil soup, pesto quinoa salad, sliced jicama and bags of veggies for snacks

Breakfasts: 

  • Baked oatmeal with with sour cherries (you can add any favorite fruit to this recipe – about 2 c of fresh fruit)
  • Granola bars for mid-morning snack

Dinners: 

  • Sunday: Mushroom Chorizo tacos w onions and bell peppers and jicama taco shells (similar to what I wrote for the Mushroom Council (client) – full recipe coming soon)
  • Monday: Leftover red lentil soup w roasted red peppers and Italian sausage from last Sunday
  • Tuesday: Grilled hamburgers, fresh sweet corn & cucumber salad
  • Wednesday: Leftover mushroom chorizo tacos & kohlrabi slaw
  • Thursday: Grilled Italian sausage & cabbage salad
  • Friday: Fresh sweet corn pesto pasta with bacon and basil (make this NOW)

Lunches: 

  • Green monster summer veggie quinoa salad with basil pesto vinaigrette
  • Leftover red lentil soup with roasted red peppers and Italian Sausage

Snacks:

  • Baggies of blanched fresh green beans and peeled and sliced carrots (I hate those slimy bags of baby carrots, and they’re 2-3x more expensive than whole carrots)
  • Nectarines and apples from the farmer’s market
  • Granola Bars

Second shelf: cabbage for salads, salsa for snacks, and fixins for chorizo mushroom tacos.

The Plan of attack:

Friday night: 

  • Take inventory of pantry and fridge
  • Menu planning, cruise blogs/Pinterest for inspiration
  • Start the farmer’s market & grocery list

Saturday:

  • Hit up the farmer’s market for local, fresh goodies
  • Make a batch of quinoa (1 1/2 cups + 3 cups water + salt) & stash in the fridge
  • Make granola bars (1 batch lasts us 2+ weeks) & stash in the fridge in a large storage container with parchment paper between layers
  • Night: Prep the baked oatmeal by putting the oats in the almond milk/egg mixture to soak overnight in the fridge

Sunday: 

  • 7am: Preheat the oven and bake the oatmeal. Walk the dog, bring the phone along to add to the grocery list on my list app.
  • 8am: Let the oatmeal cool, and raid Whole Foods or Rogers Park Fruit Market for any items needed for the week
  • 9am: Cooking begins…the trick here is to multi-task as much as possible for maximum efficiency – have something working in the oven or on the stovetop while you’re chopping. Turn on some upbeat tunes and be diligent in setting timers so nothing burns as you multitask.
    • Note: while you get down in the kitchen, this is a perfect time for your spouse/partner/SO to do some cleaning around the house
  • 12pm: Done cooking, and time to relax – perhaps with my favorite margarita.

This morning’s session went something like this: 

  • Preheat oven to broil.
    • Meanwhile: scoop baked oatmeal into storage containers for the week ahead & stash in fridge.
  • Roast red bell peppers for quinoa salad, turning peppers every five minutes.
    • Meanwhile: boil water and blanch green beans, drain beans and chill in an ice water bath
  • Shuck 3 ears of fresh sweet corn & slice kernels off cob. Heat a large, non-stick pan over medium heat, add 1 T olive oil and saute for 5 minutes
    • Meanwhile: Dump cooked quinoa in a large mixing bowl. Dice leftover grilled steak from Friday’s dinner for deployment in quinoa salad. Peel & chop roasted bell peppers & chop a handful of beans for quinoa salad. Add chopped veggies & steak to quinoa bowl. Set aside rest of green beans for snack baggies.
    • Add sauteed corn to the bowl of quinoa, meat and veggies. Gently stir to combine.
  • Make pesto vinaigrette in the food processor: 2 handfuls of fresh basil, stems removed, 3 T marcona almonds, 1 garlic clove, juice of 1/2 lemon, zest of 1 lemon & 1/4 cup olive oil. Process until smooth, add salt & pepper to taste.
  • Scrape the pesto vinaigrette onto the quinoa salad mixture. Use a spatula to gently stir until all quinoa is lightly dressed in pesto dressing. Crumble a handful of feta into the salad and stir a final time. Scoop into storage containers and stash in the fridge.
  • Peel & slice 1lb of carrots and portion into snack baggies along with the rest of the green beans, and place all baggies of veggies into an open storage container in the fridge for easy grabbing.
  • Make watermelon lemonade sorbet base: slice and cube watermelon and dump into the blender. De-seed and juice 3 lemons. Make lemon simple syrup with sugar and lemon juice – add finished syrup to the watermelon, and puree. Stash the sorbet base in the fridge to chill before churning around dinner time.
  • Wash 1.5 lbs of mushrooms in a salad spinner filled with cold water. Swish the mushrooms around a bit to shake all the dirt loose, then pick up the basket to drain. Dump the filthy water, and spin gently.  (Now, I know washing mushrooms is taboo, but people – these things grow in manure, and that’s just not good eats, as Alton Brown would say. So if you’re planning to use mushrooms the same day you wash them, there’s truly no harm in it so far as I’ve experienced.)
  • De-stem the mushrooms (save the stems for stock in a bag in the freezer, since you’ve already washed them) and dice into 1/2” cubes. Store in a large storage container for use in mushroom chorizo tacos for dinner.
  • Dice 1/2 white onion and 1 large red bell pepper for the mushroom tacos. Store in a separate storage container in the fridge.
  • Make Salsa: dump 1/4 of an onion, a handful of cilantro, pinch of salt & garlic powder in a mini-prep processor with 1 can of fire roasted diced tomatoes and 1 T chipotle puree. Whizz & jar. Done.

And that, my friends, is roughly what happens in my kitchen every Sunday morning.  What are your prep-ahead secrets? How do you tackle menu planning for the week?  Share your tips for weekday culinary success in the comments below!